

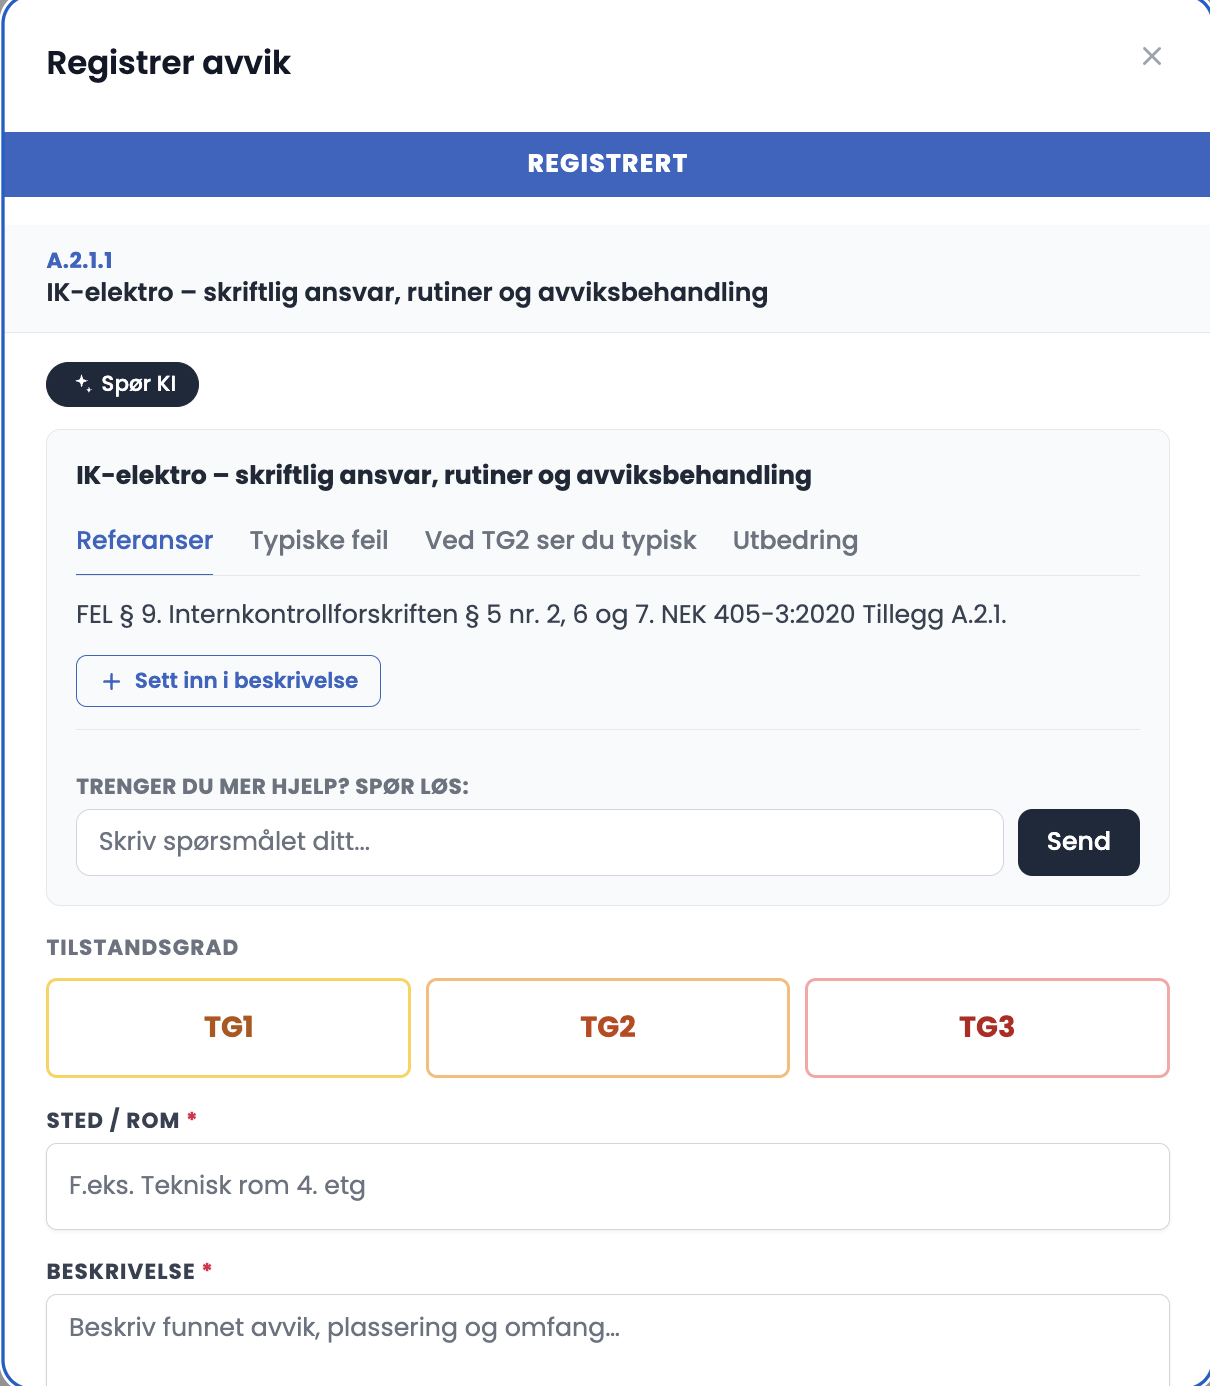
The deviation dialog has professional guidance built in at the top, so you can check the basis without leaving the form.
How to do it
- Click "+ Register" at the point, and choose "Register deviation".
- Read through the guidance tabs to make sure the grading is right.
- Click "Insert into description" to copy the text from the open tab straight into the description field, and add your own observations.
- Choose the condition grade. The consequence of the choice is shown under the buttons.
- Fill in Location / room and Description. Both are mandatory, marked with a red asterisk.
- Fill in Suggested remedy with the recommended action and a deadline.
- Upload photos if needed, and click "Save deviation / comment".
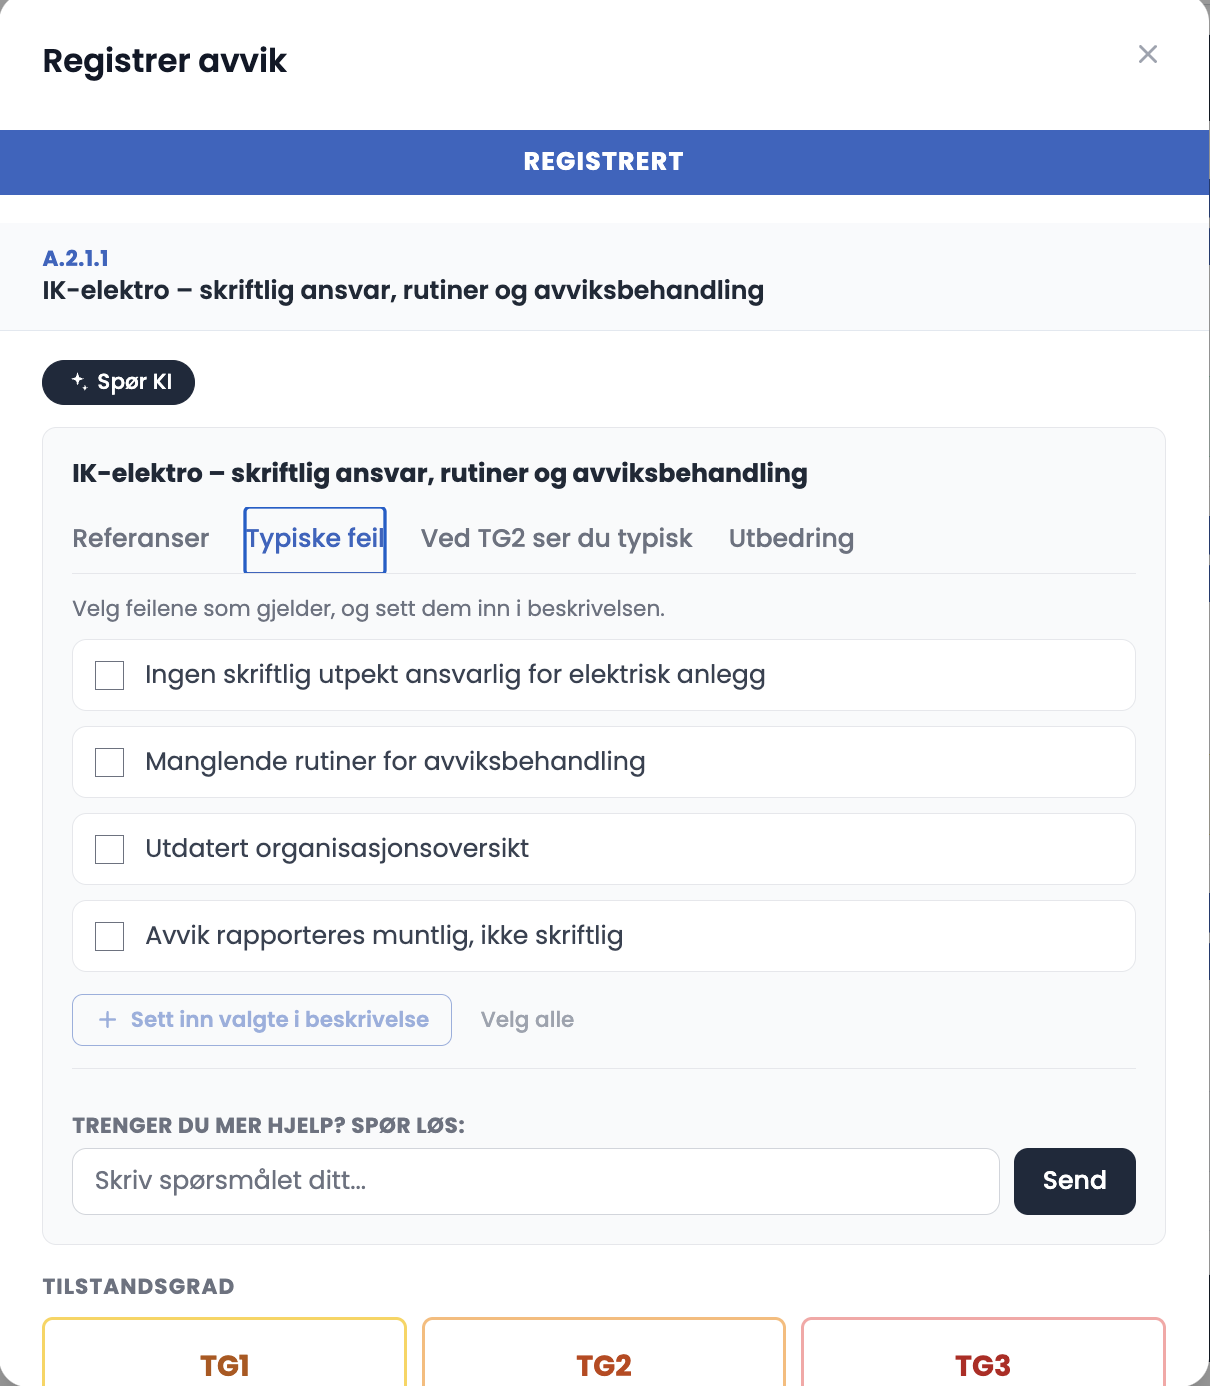
The four tabs
| Tab | Content |
|---|---|
| References | The legal basis for the point, for example FEL § 9 and the Internal Control Regulations § 5 |
| Typical faults | Tickable wordings you can insert into the description |
| At TG2 you typically see | What characterises a significant deviation on this point |
| Remedy | Suggested actions |
The grades and what they mean
| Grade | Consequence |
|---|---|
| TG1 | Minor or moderate deviation |
| TG2 | Significant deviation, remedy within 1 month |
| TG3 | Critical deviation, immediate action required |
Tips
- "Insert selected into description" gives a consistent wording of deviations across inspectors. Use it as a starting point, and add what is specific to this installation.
- Write the suggested remedy concretely enough that another electrician can price the job without calling you.
- One photo of the deviation and one that shows where in the installation it is. The close-up alone is hard to place afterwards.
- One inspection point can have several entries. If you have the same deviation in three distribution boards, record three, with a location on each.
Can I change the grade after saving?
Yes. Click "Edit" on the entry line under the inspection point. As long as the report has not been submitted, everything can be changed.