

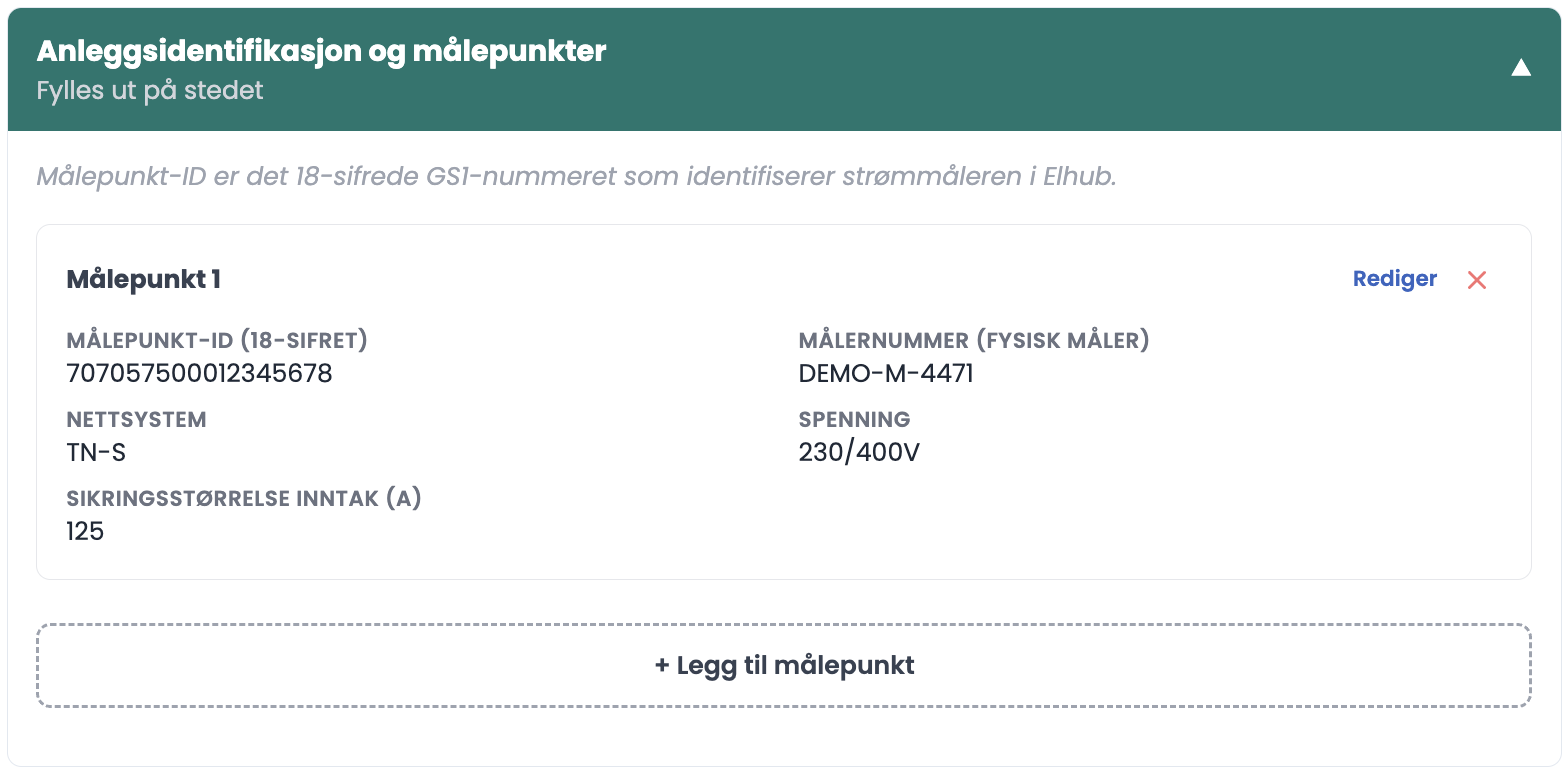
The metering points identify the installation towards the grid. The section is filled in on site, and one installation can have several.
How to do it
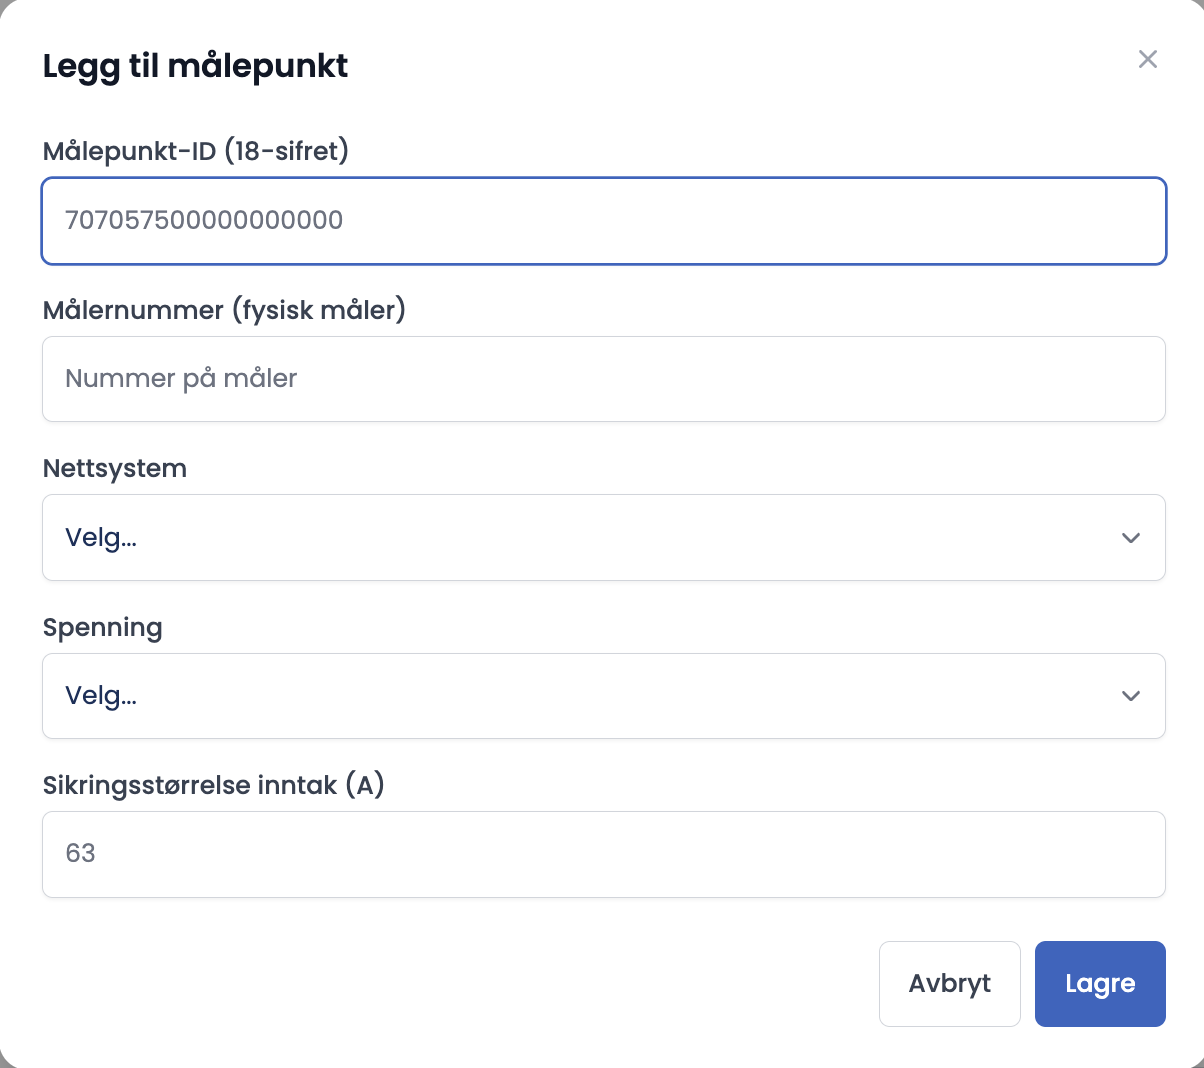
- Click "+ Add metering point". A dialog opens.
- Fill in the 18-digit METERING POINT ID, and the meter number from the physical meter.
- Choose the earthing system: IT, TT, TN-S, TN-C-S or TN-C.
- Choose the voltage: 230V, 400V or 230/400V.
- Enter the size of the main fuse in amperes.
- Click "Save".
Good to know
- The metering point ID is the 18-digit GS1 number that identifies the electricity meter in Elhub.
- The meter number is something else: it is the number printed on the meter itself.
- If the installation has several metering points, you repeat the whole sequence. Each metering point becomes its own card.
Tips
- Photograph the meter label before you start typing. Then you don't have to stand in the cabinet reading while you type.
- The earthing system determines how several inspection points are assessed, among them earth fault protection. Get it right the first time.
- If the main fuse is not marked, note it under Special conditions in Inspection object instead of guessing.
What if I can't find the metering point ID?
It is on the grid company's invoice and in Elhub, and often on a sticker inside the meter cabinet. If you can't get it on site, save the rest of the metering point and fill it in before you submit the report.