

Use this when you thermograph a single object without doing a full set of measurements on it.
How to do it
- Click “+ Register thermography” in the Measurements section.
- Fill in Location and Description. Both are required.
- Enter the maximum temperature and the reference temperature. ΔT is calculated automatically and the field is locked.
- State the load, and upload the thermogram.
- Set a condition grade if you have found a deviation. The dialog then changes its title and gets a colour banner, for example “TG2”.
- Save. The record becomes a card in the same way as a measurement.
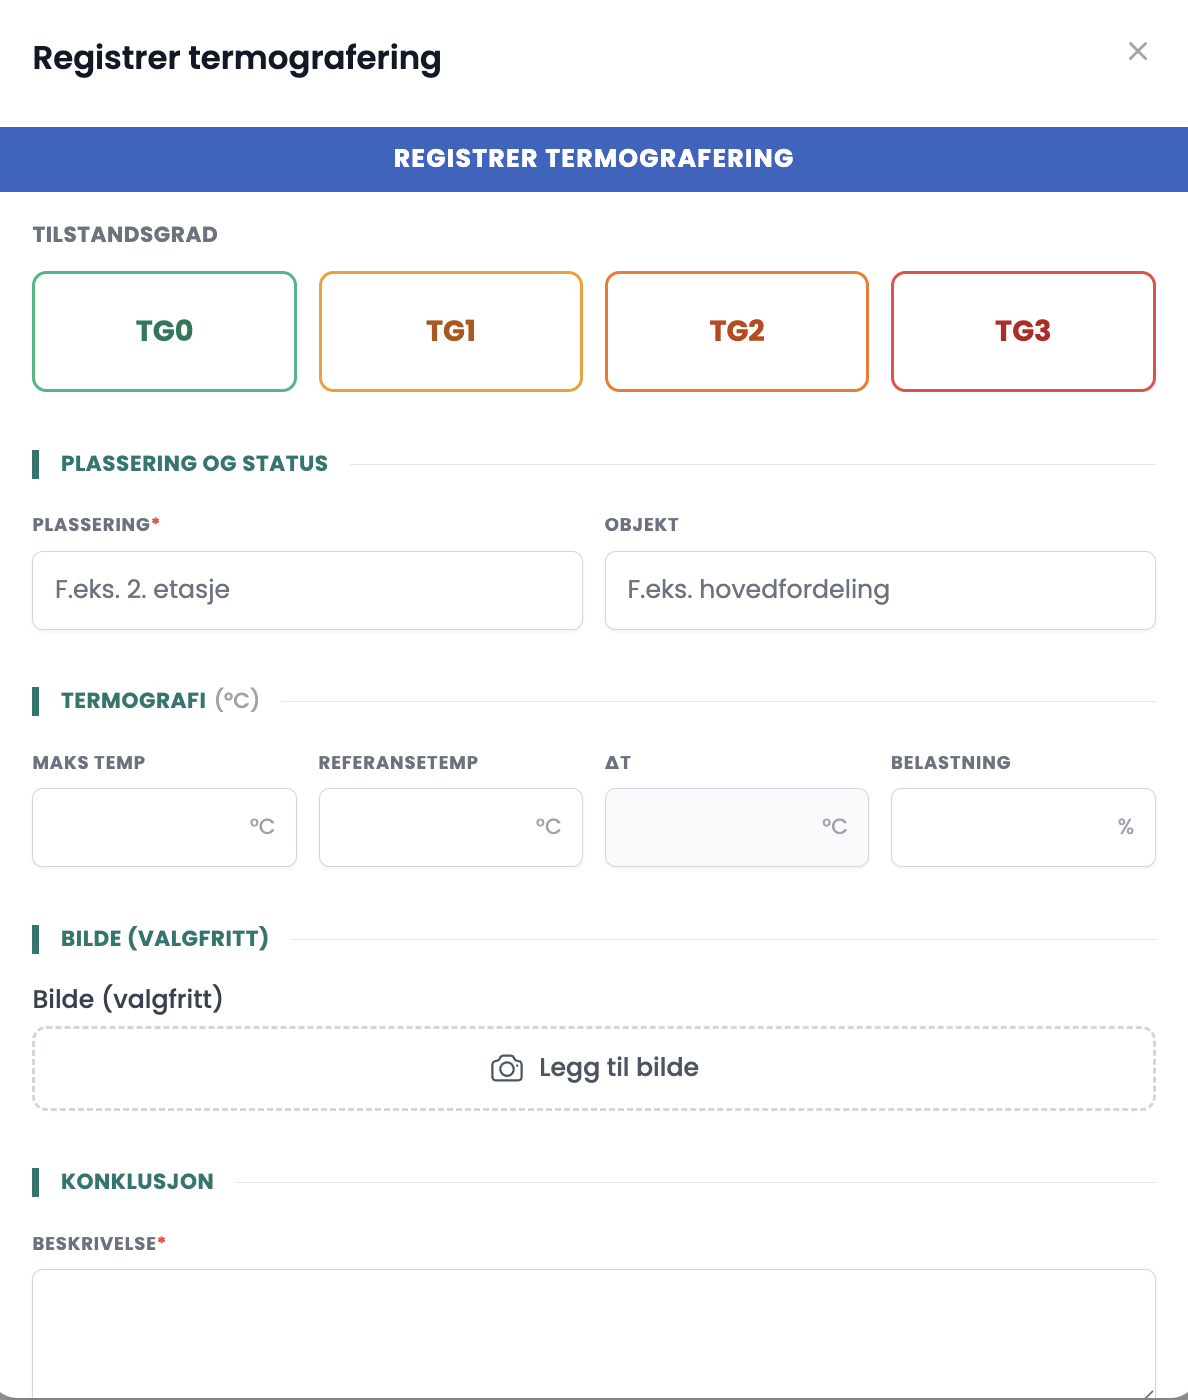
Fields in the dialog
| Group | Field |
|---|---|
| Condition grade | TG0 to TG3, optional |
| Location and status | Location (required) · Description (required) · Object |
| Thermography (°C) | Max temp · Reference temp · ΔT (°C, locked) · Load (%) |
| Attachment | Image (optional) |
Good to know
- Object, temperatures, load, image and Recommended remedial action are optional fields.
- ΔT is the difference between the maximum temperature and the reference temperature. You should not write in the field yourself.
- One record per object. If you have three warm terminals in the same board, that is three records.
Tips
- Note the load the object had when you measured. Without it, ΔT is difficult to assess afterwards.
- Take the thermogram and an ordinary photo of the same place. The customer understands the ordinary photo; the electrician uses the thermogram.
- Thermograph under load. If the load is too low, say so in the Description instead of leaving the object out.
Does the grade I set here count towards the summary at the top?
No. The counters at the top of the inspection points section only show grades set on the inspection points A to R. A TG2 you register as a thermography record does not appear there. If the deviation is to be visible in the overview, you must also register it on the inspection point it concerns.